Toilet Flush Valves
There are several styles of toilet flush valves, but far and away the
most common is the plastic toilet flush valve with tubular overflow and rubber
flapper.
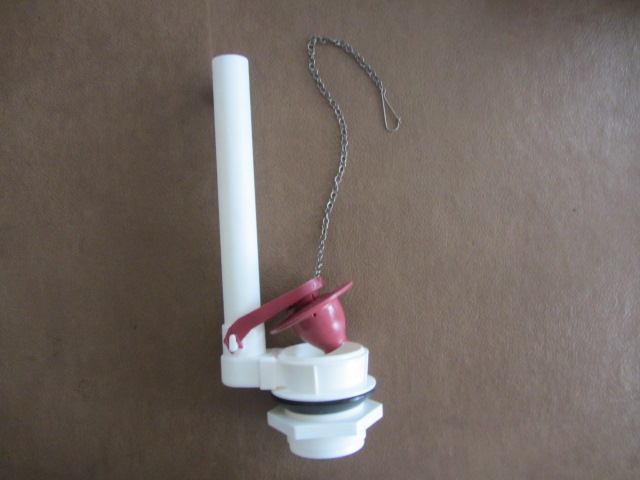
Here is a nice example with an older "Fluid Master" brand flapper.
The more vintage version of this is brass. When the brass valve is in a wall hung tank, plumbers call it a Douglas valve.
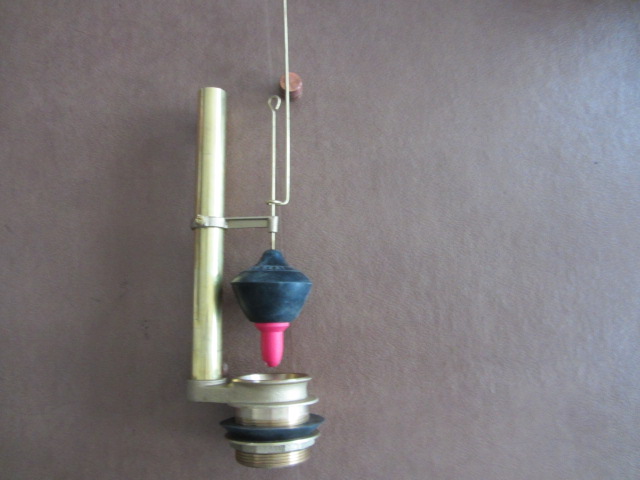
This Douglas valve is shown with a set of lift wires and flush ball. You can substitute with a "Fluid Master Bulls eye flapper", it comes with a mounting fitting to slide onto the brass overflow tube.
The plastic valve has “ears” to attach the flapper to. The brass has no ears and must be fitted with a flapper that attaches to the overflow tube, or must be rigged with the old style lift wires and flush ball. Lift wires are a tricky arrangement to set up, but once set they work well for years.
Flush valves are rarely replaced when made of plastic, as they don’t move or degrade. Brass flush valves corrupt at the flapper seat, and the overflow tube. Brass overflow tubes can be purchased and are easy to install. Removing the broken stub of thread they leave in the cast brass valve is not easy.
When replacing a Douglas valve in a "flush ell" toilet, make sure you get a replacement valve that has a shank as
long as the one you removed. If you don't, you may not have enough
thread below the tank to set both the lock nut and the two inch slip
joint nut. Do not replace the Douglas valve with a plastic valve, the shank is too short, so is the overflow tube. Inspect the brass for "sand holes". Sand holes are places in sand cast parts where the casting is imperfect to the point of being breached. Look especially at the threads that comprise the shank, A hole there will seem to be a gasket leak that you will not be able to fix.
If you must replace a brass flush valve in a "close coupled" toilet, use a plastic flush valve in its place. Having said all of that, the truth is that you may never have to replace a flush valve.
Most of the time
you'll be replacing flappers or flush balls. When setting flappers the
only tricky bit is setting the chain length. Set it so the chain can
never go fully tight, or be long enough to slip under the flapper. Don’t
forget to test flush the toilet again after you set the tank lid back
in place.The trip lever travel may be less with the lid in place.
Many new flappers are made for the 1.6 gallon toilets, and have a smaller float bulb than the flappers needed for 3.5, or 5 gallon toilets. If your new flapper slaps back down as soon as you trip the lever on your larger volume toilet, it may or may not be a problem with the chain length. Finding an old-style flapper may keep you from doing that funny thing where you make faces and pull at your hair.
If you have one of the many other styles of flush valves, the simple thing to do is consider it to be a proprietary product, and service it or replace it in kind. There are some funny looking toilet flush valves out there, but they are not typically hard to repair. The hardest part may be acquiring the proper kit.